Over these years, Android has grown really well to become one of the most popular mobile operating system out there. Nowadays applications in the Google Play Store, especially Android games are so interesting and high defined that we would love to play these games on our PC.
However, currently there is no quick and official way out there that would let you to play Android games or run Android apps on your PC. However, thanks to some tech genius, you can now run Android apk apps on your PC by following some simple steps.
And today, we’re here with a detailed tutorial on how you can download and run Android apk files to your PC directly from the Google Play Store.
Here below we have listed two working methods to download APK files from play store
How To Download APK Files Directly From Google Play Store To Your PC:
Method 1:
Go to Apps.evozi.com/apk-downloader
Paste your desired App/game APK file link
Then Click on Generate Download link
Now Site will display few details about App,
Move your cursor and click on "Click here to download Your name now"
That's it! It will start downloading
Monday, March 17, 2014
Tuesday, February 25, 2014
android කෝඩ්
In this post I will explain about some Android Secret Codes which are helpful to know about android device hardware and software configurations.
Now a days everyone using Smartphones that is Known Fact. And in India Most of the people are using Android Mobiles and Tablets. According to statistics Samsung alone sold almost 2 crores galaxy mobiles in India. And recently Micromax announced that it sold 1 million canvas mobiles phones and these statistics are increasing day by day.
So it’s good know about these secret codes.
Android Secret Codes:
AndroidSecretCodes
AndroidSecretCodes
If your are an android geek or developer you might know these secret codes(or at least some of them).These codes are used by developers and Companies to change some system configurations .
Go through the following list
For IMEI Number: *#06#
For RAM Memory version: *#*#3264#*#*
For FTA SW version: *#*#1111#*#*
For FTA HW version: *#*#2222#*#*
For Touchscreen version: *#*#2663#*#*
To test Bluetooth: *#*#232331#*#*
To display Bluetooth Physic Address: #*#232337#*#
To test secret GPS: *#*#1472365#*#*
To test other GPS: *#*#1575#*#*
To test WiFi/Wireless LAN of phone: *#*#232339#*#* or *#*#528#*#* or *#*#526#*#*
To display Wi-Fi MAC Address: *#*#232338#*#*
To test Vibration and Back-light of device: *#*#0842#*#*
To test Proximity/Distance Sensor: *#*#0588#*#*
To test Touchscreen: *#*#2663#*#*
For Audio Test: *#*#0289#*#* or *#*#0673#*#*
To launch Service Mode: *#*#197328640#*#*
Hidden Service Menu (Motorola Droid): ##7764726
Field Test: *#*#7262626#*#*
To format the phone: *2767*3855#
To Restore Factory Settings: *#*#7780#*#*
To create Immediate backup of your multimedia files: *#*#273282*255*663282*#*#*
To display Phone Information: *#*#4636#*#*
To get detailed Camera Information: *#*#34971539#*#*
For Software & Hardware Information: *#12580*369#
To display HSDPA/HSUPA Control Menu: *#301279#
To start GTalk Monitoring: *#*#8255#*#*
To get PDA, Phone, H/W and RF Call Date: *#*#4986*2650468#*#*
Displays Build Time and Change List number: *#*#44336#*#*
Packet Loopback Test: *#*#0283#*#*
LCD Display Test: *#*#0*#*#*
Enter Service Menu (on New Phones): *#0*#
Diagnostic Configuration: *#9090#
USB Logging Control: *#872564#
System Dump Mode: *#9900#
View Phone Lock Status: *#7465625#
Executes Emergency Dial Screen to unlock PUK Code: **05**#
Enables Voice Dialing Logging Mode: *#*#8351#*#*
Disables Voice Dialing Logging Mode: *#*#8350#*#*
Change behavior of Power button: *#*#7594#*#*
Bonus Tip : Has he or she read my email yet? are they Ignoring You Find your email has been read by the recipient! No More Guessing
How to remember Android Secret Codes?
No need to remember all these secret codes they are one finger tap away from you.Just install Android Secret Codes app from Google Store Enjoy and Have Fun.
Here are the some screenshots of this app
Android-Secret-Code
Android Secret Code application
Android-Secret-Code
Android Secret Code application
IMPORTANT! Some manufacturers not allow the use of these codes and they may not work on your device. By using secret codes you can change some of your device settings. Use at your own risk!
Thanks for Reading my Post. Please Take a look around My blog,Keep up to date with my Posts..
32-bit, 64-bit ??? මොකක්ද මේ???
අපේ ගොඩක් අය 32-bit, 64-bit කියල අහලත් ඇතිනේ, එත් සමහර අය ඒවායේ ඇත්ත තේරුම්, ඒවගෙන් මොනවද වෙන්නේ කියල දැන් නැතුව ඇති. එනිසා මම අද 32-bit හා 64-bit මෙහෙයුම් පද්ධති (Operating System - XP, Vista, Win7, Win8) පිළිබදව, ඒවායේ වෙනස්කම් හා ඒවායෙන් පරිගණකයට සුදුසුම කුමක්ද යන්න තමා කියන්නේ. ඕගොල්ලෝ දන් නැති, ගොඩක් වටිනා විස්තර මේ post එකේ ඇති ඒ නිසා කියවලම බලන්න..

මූලික වශයෙන් 32-bit හා 64-bit යනු processor එක සැලසුම් කර ඇති ආකාරයයි. ඒවාට ගැළපෙන ලෙස මෙහෙයුම් පද්ධති සැලසුම් කල විට ඒවාත් 32-bit හා 64-bit යනුවෙන් හදුන්වයි. එම මෙහෙයුම් පද්ධති වලට ගැලපෙන වෙනත් වැඩසටහන්ද (software) හදුන්වන්නේ එම bit අගය ඇසුරෙනි. 64-bit මාදිලියේ වැඩසටහන් භාවිතා කළ හැක්කේ 64-bit වලට සහය දෙන processors ඇති පරිගණක වලදී පමණක් වුවත්, 32-bit මාදිලියේ වැඩසටහන් මේ කවර එකකදී වුව භාවිත කළ හැකිය.
එහෙත් එහිදී මුහුණ පාන්නට වෙන ගැටලුව වන්නේ 32-bit මෙහෙයුම් පද්ධතියකට භාවිතා කළ හැකි උපරිම ram ධාරිතාව 3.41 GB (සමහර 32-bit OS වලට 4GB support කරයි. නමුත් බොහෝ විට එහි සම්පුර්ණ වේගය ලබා නොදෙයි) කට සීමාවීමයි. එහෙත් 64-bit මෙහෙයුම් පද්ධතියක් සදහා 128 GB දක්වා සහය දක්වයි. මේ නිසා 4 GB හෝ ඊට වැඩි ram ප්රමාණයක් භාවිතා කරන්නන්ට, 64-bit මෙහෙයුම් පද්ධතියක් install කර ගත යුතුය.

64-bit මෙහෙයුම් පද්ධතියක් install කර ගැනීමේ ඇති අවාසි වන්නේ ඇතැම් වැඩසටහන් ඒ සමග නොගැලපීමයි. තරමක් පැරණි software හෝ hardware භාවිතා කරන්නේ නම් 64-bit මෙහෙයුම් පද්ධතිය සමග ඒවා නොගැළපෙන අවස්ථා වැඩිය.
64-bit මෙහෙයුම් පද්ධති වල ඇති මූලික වාසිය වන්නේ එවිට 64-bit processor එකෙන් උපරිම වැඩ ගත හැකිවීමයි. එසේම ram එක සමග වේගයෙන් කටයුතු හැකිවීමයි. අනෙක් අතට දැන් තිබෙන සමහර වැඩසටහන් නිර්මාණය කරන්නේ 64-bit මෙහෙයුම් පද්ධතිය සමග ගැලපෙන ආකාරයෙනි. එනිසා මෙම අලුත් වැඩසටහන් වලින් වැඩ කරන්නට නම් අනිවාර්යයෙන්ම 64-bit මෙහෙයුම් පද්ධතියක් පරිගණකයට install කර ගත යුතුය.
මූලික වශයෙන් 32-bit හා 64-bit යනු processor එක සැලසුම් කර ඇති ආකාරයයි. ඒවාට ගැළපෙන ලෙස මෙහෙයුම් පද්ධති සැලසුම් කල විට ඒවාත් 32-bit හා 64-bit යනුවෙන් හදුන්වයි. එම මෙහෙයුම් පද්ධති වලට ගැලපෙන වෙනත් වැඩසටහන්ද (software) හදුන්වන්නේ එම bit අගය ඇසුරෙනි. 64-bit මාදිලියේ වැඩසටහන් භාවිතා කළ හැක්කේ 64-bit වලට සහය දෙන processors ඇති පරිගණක වලදී පමණක් වුවත්, 32-bit මාදිලියේ වැඩසටහන් මේ කවර එකකදී වුව භාවිත කළ හැකිය.
එහෙත් එහිදී මුහුණ පාන්නට වෙන ගැටලුව වන්නේ 32-bit මෙහෙයුම් පද්ධතියකට භාවිතා කළ හැකි උපරිම ram ධාරිතාව 3.41 GB (සමහර 32-bit OS වලට 4GB support කරයි. නමුත් බොහෝ විට එහි සම්පුර්ණ වේගය ලබා නොදෙයි) කට සීමාවීමයි. එහෙත් 64-bit මෙහෙයුම් පද්ධතියක් සදහා 128 GB දක්වා සහය දක්වයි. මේ නිසා 4 GB හෝ ඊට වැඩි ram ප්රමාණයක් භාවිතා කරන්නන්ට, 64-bit මෙහෙයුම් පද්ධතියක් install කර ගත යුතුය.
64-bit මෙහෙයුම් පද්ධතියක් install කර ගැනීමේ ඇති අවාසි වන්නේ ඇතැම් වැඩසටහන් ඒ සමග නොගැලපීමයි. තරමක් පැරණි software හෝ hardware භාවිතා කරන්නේ නම් 64-bit මෙහෙයුම් පද්ධතිය සමග ඒවා නොගැළපෙන අවස්ථා වැඩිය.
64-bit මෙහෙයුම් පද්ධති වල ඇති මූලික වාසිය වන්නේ එවිට 64-bit processor එකෙන් උපරිම වැඩ ගත හැකිවීමයි. එසේම ram එක සමග වේගයෙන් කටයුතු හැකිවීමයි. අනෙක් අතට දැන් තිබෙන සමහර වැඩසටහන් නිර්මාණය කරන්නේ 64-bit මෙහෙයුම් පද්ධතිය සමග ගැලපෙන ආකාරයෙනි. එනිසා මෙම අලුත් වැඩසටහන් වලින් වැඩ කරන්නට නම් අනිවාර්යයෙන්ම 64-bit මෙහෙයුම් පද්ධතියක් පරිගණකයට install කර ගත යුතුය.
ඔබ දන්නා ඔන්න keyboard short කට්ස් 100 කටත් වැඩියෙන්..

Keyboard Shortcuts (Microsoft Windows)
1. CTRL+C (Copy)
2. CTRL+X (Cut)
3. CTRL+V (Paste)
4. CTRL+Z (Undo)
5. DELETE (Delete)
6. SHIFT+DELETE (Delete the selected item permanently without placing the item in the Recycle Bin)
7. CTRL while dragging an item (Copy the selected item)
8. CTRL+SHIFT while dragging an item (Create a shortcut to the selected item)
9. F2 key (Rename the selected item)
10. CTRL+RIGHT ARROW (Move the insertion point to the beginning of the next word)
11. CTRL+LEFT ARROW (Move the insertion point to the beginning of the previous word)
12. CTRL+DOWN ARROW (Move the insertion point to the beginning of the next paragraph)
13. CTRL+UP ARROW (Move the insertion point to the beginning of the previous paragraph)
14. CTRL+SHIFT with any of the arrow keys (Highlight a block of text)
SHIFT with any of the arrow keys (Select more than one item in a window or on the desktop, or select text in a document)
15. CTRL+A (Select all)
16. F3 key (Search for a file or a folder)
17. ALT+ENTER (View the properties for the selected item)
18. ALT+F4 (Close the active item, or quit the active program)
19. ALT+ENTER (Display the properties of the selected object)
20. ALT+SPACEBAR (Open the shortcut menu for the active window)
21. CTRL+F4 (Close the active document in programs that enable you to have multiple documents open simultaneously)
22. ALT+TAB (Switch between the open items)
23. ALT+ESC (Cycle through items in the order that they had been opened)
24. F6 key (Cycle through the screen elements in a window or on the desktop)
25. F4 key (Display the Address bar list in My Computer or Windows Explorer)
26. SHIFT+F10 (Display the shortcut menu for the selected item)
27. ALT+SPACEBAR (Display the System menu for the active window)
28. CTRL+ESC (Display the Start menu)
29. ALT+Underlined letter in a menu name (Display the corresponding menu) Underlined letter in a command name on an open menu (Perform the corresponding command)
30. F10 key (Activate the menu bar in the active program)
31. RIGHT ARROW (Open the next menu to the right, or open a sub menu)
32. LEFT ARROW (Open the next menu to the left, or close a sub menu)
33. F5 key (Update the active window)
34. BACKSPACE (View the folder one level up in My Computer or Windows Explorer)
35. ESC (Cancel the current task)
36. SHIFT when you insert a CD into the CD-ROM drive (Prevent the CD-ROM from automatically playing)
Dialog Box - Keyboard Shortcuts
1. CTRL+TAB (Move forward through the tabs)
2. CTRL+SHIFT+TAB (Move backward through the tabs)
3. TAB (Move forward through the options)
4. SHIFT+TAB (Move backward through the options)
5. ALT+Underlined letter (Perform the corresponding command or select the corresponding option)
6. ENTER (Perform the command for the active option or button)
7. SPACEBAR (Select or clear the check box if the active option is a check box)
8. Arrow keys (Select a button if the active option is a group of option buttons)
9. F1 key (Display Help)
10. F4 key (Display the items in the active list)
11. BACKSPACE (Open a folder one level up if a folder is selected in the Save As or Open dialog box)
Microsoft Natural Keyboard Shortcuts
1. Windows Logo (Display or hide the Start menu)
2. Windows Logo+BREAK (Display the System Properties dialog box)
3. Windows Logo+D (Display the desktop)
4. Windows Logo+M (Minimize all of the windows)
5. Windows Logo+SHIFT+M (Restore the minimized windows)
6. Windows Logo+E (Open My Computer)
7. Windows Logo+F (Search for a file or a folder)
8. CTRL+Windows Logo+F (Search for computers)
9. Windows Logo+F1 (Display Windows Help)
10. Windows Logo+ L (Lock the keyboard)
11. Windows Logo+R (Open the Run dialog box)
12. Windows Logo+U (Open Utility Manager)
13. Accessibility Keyboard Shortcuts
14. Right SHIFT for eight seconds (Switch Filter Keys either on or off)
15. Left ALT+left SHIFT+PRINT SCREEN (Switch High Contrast either on or off)
16. Left ALT+left SHIFT+NUM LOCK (Switch the Mouse Keys either on or off)
17. SHIFT five times (Switch the Sticky Keys either on or off)
18. NUM LOCK for five seconds (Switch the Toggle Keys either on or off)
19. Windows Logo +U (Open Utility Manager)
20. Windows Explorer Keyboard Shortcuts
21. END (Display the bottom of the active window)
22. HOME (Display the top of the active window)
23. NUM LOCK+Asterisk sign (*) (Display all of the sub folders that are under the selected folder)
24. NUM LOCK+Plus sign (+) (Display the contents of the selected folder)
25. NUM LOCK+Minus sign (-) (Collapse the selected folder)
26. LEFT ARROW (Collapse the current selection if it is expanded, or select the parent folder)
27. RIGHT ARROW (Display the current selection if it is collapsed, or select the first sub folder)
Shortcut Keys for Character Map
After you double-click a character on the grid of characters, you can move through the grid by using the keyboard shortcuts:
1. RIGHT ARROW (Move to the rightor to the beginning of the next line)
2. LEFT ARROW (Move to the left orto the end of the previous line)
3. UP ARROW (Move up one row)
4. DOWN ARROW (Move down one row)
5. PAGE UP (Move up one screen at a time)
6. PAGE DOWN (Move down one screen at a time)
7. HOME (Move to the beginning of the line)
8. END (Move to the end of the line)
9. CTRL+HOME (Move to the first character)
10. CTRL+END (Move to the last character)
11. SPACEBAR (Switch between Enlarged and Normal mode when a character is selected)
Microsoft Management Console (MMC)
Main Window Keyboard Shortcuts
1. CTRL+O (Open a saved console)
2. CTRL+N (Open a new console)
3. CTRL+S (Save the open console)
4. CTRL+M (Add or remove a console item)
5. CTRL+W (Open a new window)
6. F5 key (Update the content of all console windows)
7. ALT+SPACEBAR (Display the MMC window menu)
8. ALT+F4 (Close the console)
9. ALT+A (Display the Action menu)
10. ALT+V (Display the View menu)
11. ALT+F (Display the File menu)
12. ALT+O (Display the Favorites menu)
MMC Console Window Keyboard Shortcuts
1. CTRL+P (Print the current page or active pane)
2. ALT+Minus sign (-) (Display the window menu for the active console window)
3. SHIFT+F10 (Display the Action shortcut menu for the selected item)
4. F1 key (Open the Help topic, if any, for the selected item)
5. F5 key (Update the content of all console windows)
6. CTRL+F10 (Maximize the active console window)
7. CTRL+F5 (Restore the active console window)
8. ALT+ENTER (Display the Properties dialog box, if any, for the selected item)
9. F2 key (Rename the selected item)
10. CTRL+F4 (Close the active console window. When a console has only one console window, this shortcut closes the console)
Remote Desktop Connection Navigation
1. CTRL+ALT+END (Open the Microsoft Windows NT Security dialog box)
2. ALT+PAGE UP (Switch between programs from left to right)
3. ALT+PAGE DOWN (Switch between programs from right to left)
4. ALT+INSERT (Cycle through the programs in most recently used order)
5. ALT+HOME (Display the Start menu)
6. CTRL+ALT+BREAK (Switch the client computer between a window and a full screen)
7. ALT+DELETE (Display the Windows menu)
8. CTRL+ALT+Minus sign (-) (Place a snapshot of the active window in the client on the Terminal server clipboard and provide the same functionality as pressing PRINT SCREEN on a local computer.)
9. CTRL+ALT+Plus sign (+) (Place a snapshot of the entire client window area on the Terminal server clip board and provide the same functionality as pressing ALT+PRINT SCREEN on a local computer.)
Microsoft Internet Explorer Keyboard Shortcuts
1. CTRL+B (Open the Organize Favorites dialog box)
2. CTRL+E (Open the Search bar)
3. CTRL+F (Start the Find utility)
4. CTRL+H (Open the History bar)
5. CTRL+I (Open the Favorites bar)
6. CTRL+L (Open the Open dialog box)
7. CTRL+N (Start another instance of the browser with the same Web address)
8. CTRL+O (Open the Open dialog box,the same as CTRL+L)
9. CTRL+P (Open the Print dialog box)
10. CTRL+R (Update the current Web )
හිර වෙන්නේ නැතිව youtube එකේ videos බලන්න පුළුවන් විදිහක්

අදනම් ඔයාලට ගොඩක් වටින trick එකක් අරන් තමා ඇවිත් ඉන්නේ. ඔයාලා youtube එකේ මොකක් හරි එකක් play කරන්න ගියාම ගොඩක් වෙලාවට හිර (buffering) වෙනවා නේද? ඉතින් එකට විසදුමක් තමා මේ අද කියන්න යන්නේ, ඒ කියන්නේ හිර වෙන්නේ නැතිව youtube එකේ videos බලන්න පුළුවන් විදිහක්. Speed Internet Connection තියන අයගෙනම් මෙහෙම වෙන්නේ නැතිව ඇති. එත් ගොඩක් අයගේ internet speed නෑනේ. හොදයි එහෙනම් වැඩි කතා නැතිව අපි වැඩේට බහිමුකො..
1. මුලින්ම Command Prompt (cmd) එක open කරගන්න. මතක ඇතිව cmd එක open කරද්දී 'Run as administrator' විදියට open කරගන්න.


2. දැන් මේ දීලා තියන code එක ඒ විදිහටම cmd එකේ type කරන්න.
netsh advfirewall firewall add rule name="YouTubeHack" dir=in action=block remoteip=173.194.55.0/24,206.111.0.0/16 enable=yes
3. Type කරලා ඉවරවෙලා enter press කරන්න. වැඩේ හරි නම් 'Ok' කියල කියල එයි.
4. දැන් web browser එක open කරලා youtube එකට ගිහින් video එකක් play කරලා බලන්න. ඔයාලටම හොදට වෙනස තේරෙයි.
5. මේක අයින් කරන්න ඕනෙනම්, මේ code එක type කරලා enter කරන්න.
netsh advfirewall firewall delete rule name="YouTubeHack"
වැඩේ හරිනේ, තේරෙන්නේ නැති දෙයක් තියනවනම් පහළින් comment එකක් දාන්න..
Saturday, January 11, 2014
මේකෙන් පුළුවන් ලේසියෙන්ම ඔයාගේ Facebook Fan page එකකට ලයික් කරන්න කියල , තව මොකක් හරි Facebook එකේ Event එකකට සහභාගී වෙන්න කියල ඔයාගේ යාලුවන්ට Invite කරන්න ..
ඇ කොහොමද ඇ .. හිකිස් .. ඕක ඉතින් මම හැමදාම අහන එකනේ ..ඇහුවත් නැතත් ඉතින් උත්තරෙත් එකමනේ .. හිකිස් .. ඔන්න ඉතින් ඉස්කෝලේ ඉස්පෝට් මීට් එහෙමත් පටන් ගත්ත .. මේ පාරවත් කෙල්ලෝ මැරෙන්නේ නැති මැරතන් පවත්වන ඉස්පෝට් මීට් දකින්නට ලැබේව කියල මම ප්රාර්ථනා කරනවා එහෙනම් ඇ .. :P ..
හරි හරි .. ඔන්න අද මම ආවේ පොඩි මෙව්වා එකක් අරගෙන ඇ .. ඇ ..මම මෙව්වා එකක් කිව්වට ඔයාල දන්නවයැ මෙව්වා එක මුකක්ද කීල .. හරි ඉතින් යුද්දේ ඉල්ලන්න එපා .. මම කියන්නම් .. මම කියන්නේ යන්නේ මේ Java Script කැල්ලක් ගැන .. :)
ඔව් මේකෙන් පුළුවන් ලේසියෙන්ම ඔයාගේ Facebook Fan page එකකට ලයික් කරන්න කියල , තව මොකක් හරි Facebook එකේ Event එකකට සහභාගී වෙන්න කියල ඔයාගේ යාලුවන්ට Invite කරන්න .. :)
ඇ ... මම මේක කරන හැටි කියල දෙන්නේ වෙබ් බ්රවුසර් එක විදියට Chrome පාවිච්චි කරන අයට .. අනිත් අයට හුලං .. :/
මම ගොඩින් කියන්නම ..
ෆැන් පේජ් සදහා
--> ඔයා මුලින්ම ඔයාට කට්ටියට ලයික් කරන්න ඕනි Fan Page එකට යන්න...
--> එතකොට දකුණු පැත්තේ උඩින්ම වගේ වටෙනේව නේද කට්ටියට Invite කරන තැන .. අන්න එතන තියෙනෙව See All කියල එකක් .. අන්න එක ක්ලික් කරන්න .. මම පික් එකේ දාල තියෙනෙව වගේ .. :)

--> එතකොට Pop Up Box එකක ඔයාට ඔයාගේ පොඩි යාලුවන්ගෙන් ගොඩින් ඒ පේජ් එකට ලයික් කරල තියෙන අය සහ ලයික් කරල නෑති අය පෙන්නයි ... :)
--> එක ආවට පස්සේ තමා වැඩේ හොදම හරිය .. දැන් ඔයා Ctrl+Shift+J කියන බොත්තම් තුන එකපාර ඔබන්න .. ( F12 එබුවත් අවුලක් ලෑ .. ^_^ )
--> එතකොට ඔයාට මම ඔය පහල දාල තියෙනෙව වගේ කොටුවක් පෙනෙයි Page එක යටින් .. එකේ ඔය මම රතු පාටින් කොටු කරලා තියෙන තැන තියෙන Console කියන එක ක්ලික් කරන්න .. හරිද ..

--> දැන් එතන මම මේ දීල තියෙන Java Script කැල්ල කොපි කරලා Enter බටන් එක හයියෙන් ඔබන්න .. ( හයියෙන් ඇ .. ) :3
javascript:var inputs = document.getElementsByClassName('uiButton _1sm');
for(var i=0; i<inputs.length;i++) {
inputs[i].click();
}
--> දැන් ඔයාට පෙනව ඇති කලින් අර Pop Up Box එකේ Invite කියල වැටිලා තිබ්බ තැන් නිකන්ම එබිලා වගේ වෙලා කට්ටියට Invite වෙනවා .. ( කියන්න පුළුවන් ලේසිම විදියට කිව්වේ :3 )

--> තාම හරි නැහැ .. දැන් ඒ Pop Up බොක්ස් එකේ පහලට ගිහින් බලන්නකෝ .. එකේ තවමත් ඉන්නවා නේද Invite උනේ නැති අය .. :P අන්න ඒ අයටත් Invite කරන්න මේ වැඩේ කීප වතාවක්ම කරන්න .. එතකොට හරි ..
-----------------------------------------------------------------------------------------------------------------------------
දැන් බලමු Event වලට Invite කරන හැටි ..( Only For Chrome )
--> ඔයා කලින් වගේම Event එකට ගිහින් කට්ටියට Invite කරන Pop Up එක ගන්න .. එක තියෙන්නේ අර කලින් වගේ තැනක නෙවෙයි .. event එකේ කවර් පුතෝ එකට යටින් ඇති Invite Friends කියල එකක් .. අන්න එක .. :)
--> ඊට පස්සේ පෙරසේම ( කලින් වගේ ) Ctrl+Shift+J හෝ F12 කියන ඔබල අර යටින් වැටෙන කොටුව ගන්න .. දැන් එකේ Console කියන එක උද ක්ලික් කරන්න .. :) කලින් පුටෝ ටිකම ඕනිනම් ආයිත් බලන්න .. මට දාන්න කම්මැලියි අනී ..
--> ඊට පස්සේ මම මේ පහලින් දීල තියෙන Java Script එක එතනට කොපි කොරල Enter බටන් එක හයියෙන් ඔබන්න . කැඩෙයි ඇ ...
javascript:elms=document.getElementsByName("checkableitems[]");for (i=0;i<elms.length;i++){if (elms[i].type="checkbox" )elms[i].click()}
--> දැන්නම් ඔන්න කලින් වගේ නෙවෙයි ... ඔයාට දැන් අර Invite කරන තැන (Pop Up බොක්ස් එකේ ) වැටිලා තියෙන අයගේ නම් ඉස්සරහින් හරියක් වැටිලා ඇති ... දැන් ඔයා Manually ( ඒ කියන්නේ අතින් ) pop Up බොක්ස් එක යට තියෙන Send කියන බොත්තම ඔබන්න ඕනි ..
--> දැන් ආයිත් කලින් වගේම තමා .. හැමෝටම Invite වෙලා නැතුව ඇති .. ඒ කියන්නේ කලින් පාර හැමෝවම Select වෙලා නැහැ .. ඒ කියන්නේ ඔයාට කීපවරක්ම මේ ක්රියාවලිය කරන්න වෙනවා .. :)
--------------------------------------------------------------------------------------------------------
ඇ .. එහෙනම් ඔන්න මම දන්නා දෙයක් කියල දුන්න .. ආ තව එකක් .. Script එකේ අයිතිය එහි නිර්මාතෘ සතුය .. මම ඌව දන්නේද නැත ..
සැලකිය යුතුයි : එකදිගට දිගටහරහට Invite කිරීමෙන් ඔබව Block විය හැක .. එනිසා ඉවසන්න .. කන්නාඩි දාගත්ත වදුරෙක් වගේ වෑඩ කරන්න එපා ..
ආ මේ .. මට ඉන්වයිට් කර කර ඉන්න කම්මැලියි ..ඒ නිසා මෙතැනින් ගිහින් හරි දකුණු පැත්තේ තියෙන ලයික් බොක්ස් එකෙන් හරි මගේ පේජ් එකටත් ලයික් එකක් දාගෙනම යන්න ඇ .. කමක් නැහැ ..
එහෙනම් මේ ගැන ඔයාලගේ අදහසකුත් කොටලම යන්නකෝ .. මතකනේ Photo කොමෙන්ටුත් ඔට්ටුයි ඇ ... ;)
එහෙනම් මම ගියා .. ආයිත් සෙට් වෙමු ..
එතකන් ජය වේවා !!!
Sunday, January 5, 2014
Advanced System Optimizer

මේ තියෙන්නේ එකේ Screen Short කීපයක්


මේක ඉන්ස්ට්රෝල් කලාම Register කරන්න ඕනේ.එකත් පියවරෙන් පියවරම කියල දෙන්නම්කො.නැත්නම් ඉතින් ලෙඩනේ :p.මම කලින් දාපු පොස්ට් එකකත් දීපු සොෆ්ට්වෙයා එකක් ඇක්ටිව් කරගන්න බැරුව දෙන්නෙක් විතර දගල දගල ඉදිය.හරි හරි තරහ මරහ ඉවරයි. දැන් වැඩේ පටන්ගමු.
1)මුලින්ම Notification Area එකේ තියන Advanced System Optimizer Icon එක අයින් කරගන්න.පහල ෆොටෝ එක බලන්නකෝ.එතකොට තේරෙයි.

2)ඊළගට මම ඔය දීල තියන rar ෆයිල් එකේ තියන advanced.system.optimizer.3.x-patch.rar කියන rar ෆයිල් එක ඕපන්කරන්න

එන්න ඒ rar එකේ තියන මේ advanced.system.optimizer.3.x-patch.exe කියන file එක ඩෙක්ස්ටොප් එකට එක්ස්ට්රක් කරගන්න.එක කරන්න දන්නවනේ.
3)ඊළගට advanced.system.optimizer.3.x-patch.exe කියන එක ඕපන් කරන්න
ඊට පස්සේ ඔය pach කියන බට්න් එක ක්ලික් කරන්න.ඔන්න ඔච්චරයි.වැඩේ ඉවරයි.ඔයා හරියට වැඩේ කරානම් මෙන්න මෙහෙම Registered version කියක කොළ පාටින් පැත්තකින් තියෙයි.

ඊටපස්සේ ඉක්මනට බාගෙට ස්කෑන් කරන්න ඕනේ නම් Select Scan Type කියන එකේ Quick Scanකියන එක සිලෙක්ට් කරලා දීල Start Smart Scan කියන එක ක්ලික් කරන්න.පරිගණකයේ සෑම අස්සක් මුල්ලක් නැරම ස්කෑන් කරන්න ඕනෙනම් එකේ තියන Deep Scanකියන එක සිලෙක්ට් කරලා මම කියපු විදියට කරන්න තියෙන්නේ.පලවෙනි පාර මේකෙන් ස්කෑන් කරනකොට Deep Scan වලින් ස්කෑන් කලොත් එක ඔයාගේ පරිගණකයට හොඳයි.
පහලින් අරගන්න
ඔන්න වැඩේ හරි .අවුලක් තිබ්බොත් කමෙන්ට් එකක් දාන්නකෝ.මම එහෙනම් යනවා.
සුභ අලුත් අවුරුදක් වේවා!!!
Thursday, January 2, 2014
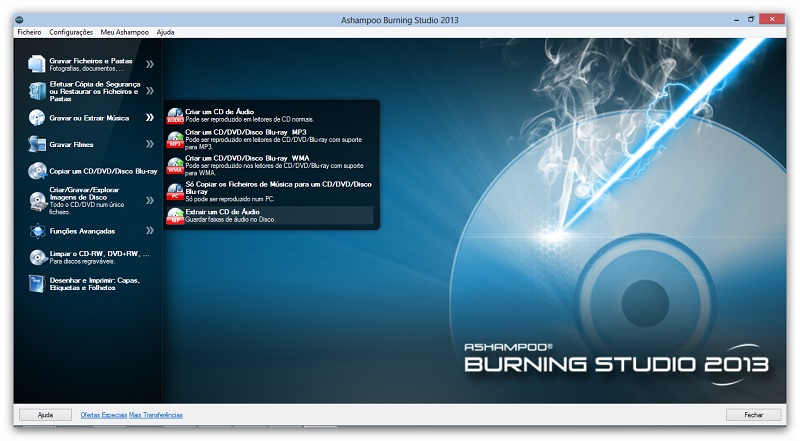
CD\DVD රයිට් කරන්න,COPY කරන්න,හොදම මෘදුකාංගයක්
.Burn Files and Folders
*Create a New CD/DVD/Blue-ray Disc
*Create a New CD/DVD/Blue-ray Disc with autostart functionality
*Update an Existing CD/DVD/Blu-ray Disc
2.Backup or Restore Files and Folders
*Backup Files and Folders
*Restore an existing backup
3.Burn or Rip music
* Create an Audio CD
* Create an MP3 or WMA CD/DVD/Blu-ray Disc
* Just Copy Music Files to a CD/DVD/Blu-ray Disc
* Rip an Audio CD
4.Burn Movies
* Movie and Slideshow Authoring for CD/DVD/Blu-ray Disc
* Burn a Video DVD from a Prepared Folder
* Burn a Video Blu-ray from a Prepared Folder
* Create a Video CD (VCD)
* Create a Super Video CD (SVCD)
* Just Copy Movie Files to a CD/DVD/Blu-ray Disc
5.Copy a CD/DVD/Blu-ray Disc
6.Create/Burn Disk Images
* Burn a CD/DVD/Blu-ray Disc from a Disc Image
* Create a Disk Image from a CD/DVD
* Create a Disk Image from a Project
7.Expert Functions
* Create a Modified Copy of an existing CD/DVD/Blu-ray Disc from a Disc Image
* Create a Data CD/DVD/Blu-ray Disc using advanced settings
8.Erase CD-RW, DVD+RW
9.Print and Design: Covers, Labels
ඔයටික ඔයාට ඇතිවෙයිනේ පහල තියෙන්නේ එකේෆොටෝ ටිකක් ඒ ටිකත් බලන්නකෝ

මම ඔයාලට මේකේ key එකත් දෙන්නම්.මම හිතනවා ඔයාගේ හිතට මේක අල්ලන්න ඇති කියල.පහලින් Download කරන්න.
**Downlaod Ashampoo®Burning Studio 2013
**Download Ashampoo®Burning Studio 2013 key
එහෙනම් මම යනවා.ඔයා යනගමන් ෆෑන් පේජ් එකට ලයික් කරගෙනම යන්න.මොකක් හරි අවුලක් තිබොත් කමෙන්ට් එකක් දාන්න.
_**ඔයාට සුබ දවසක් වේවා!**_
Subscribe to:
Posts (Atom)